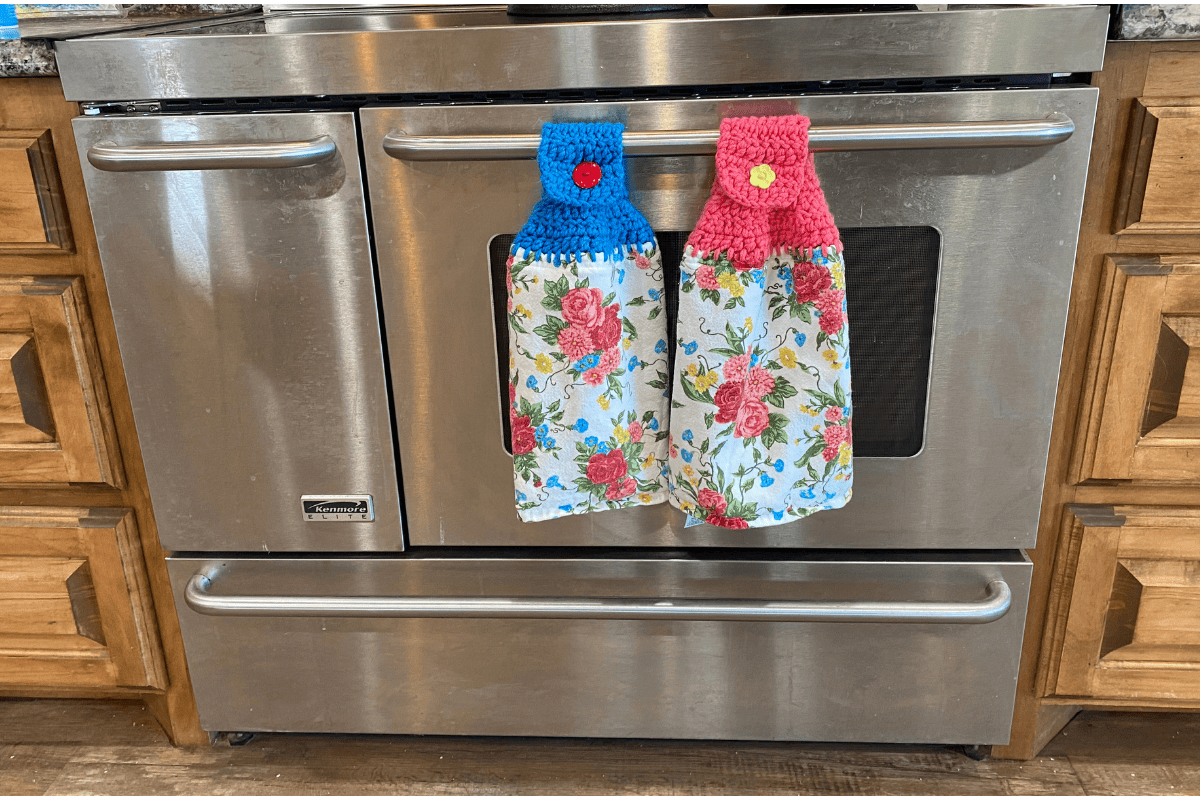
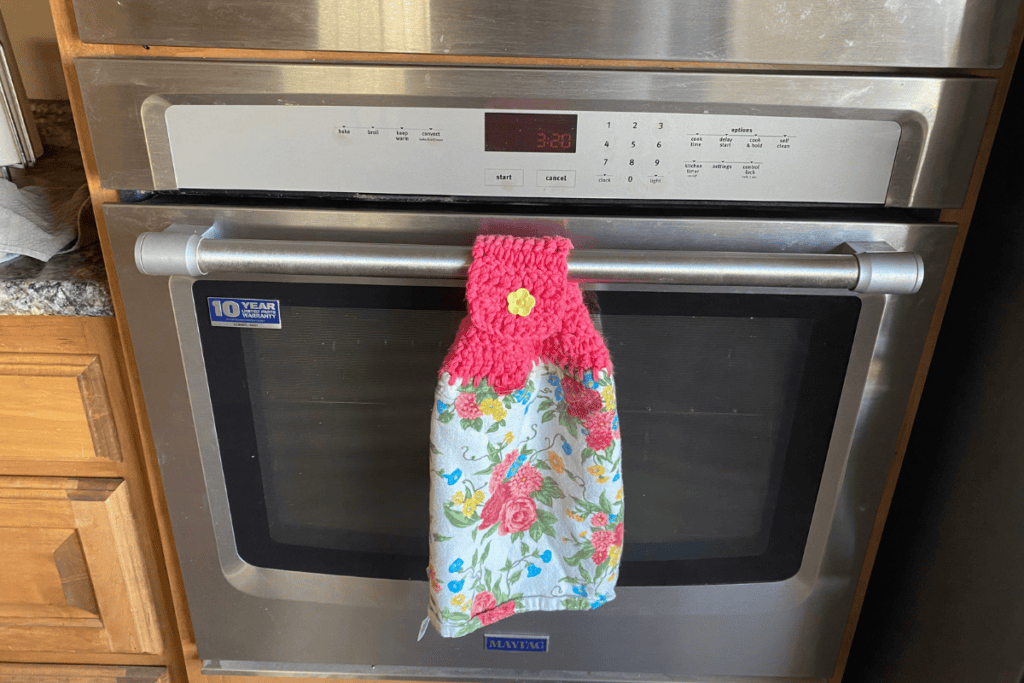
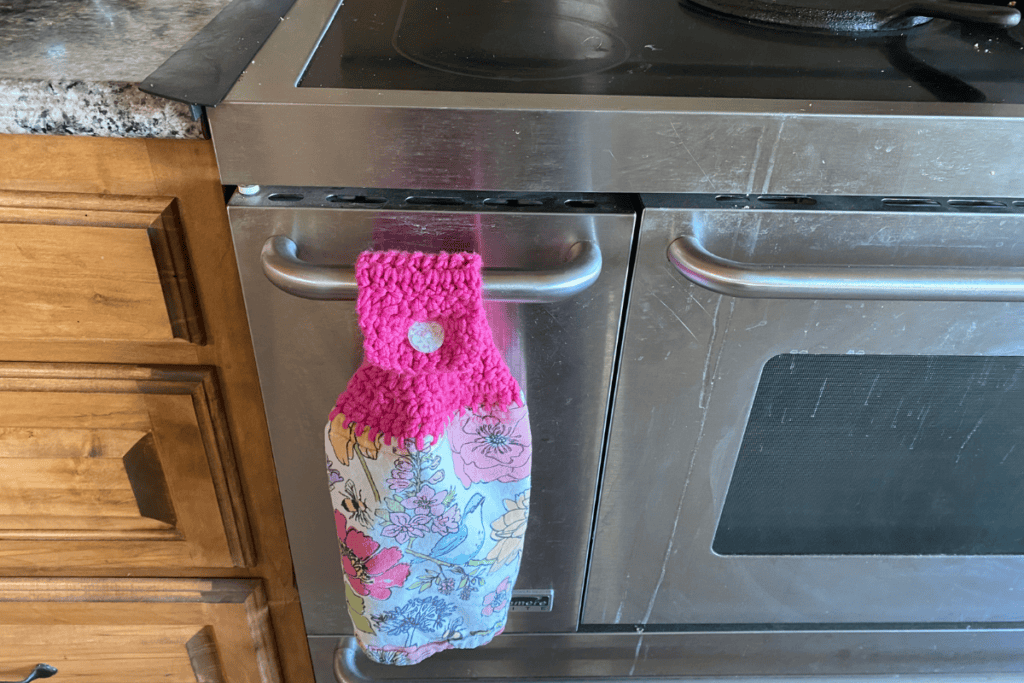
Crochet Hanging Kitchen Towel Pattern
Here is a great crochet hanging kitchen towel pattern. It is perfect for your kitchen or to give it as a gift. They are so much fun to make. This free crochet pattern is perfect for beginners.
Check out Today’s FREE Crochet Pattern:
Supplies:
- Towel (dollar store towels are perfect)
- Worsted Weight Yarn (less than 70 yards)
- H5 mm Crochet Hook
- 1.5 ” Button
- Yarn Needle
Crochet Hanging Kitchen Towel Pattern
Start by folding your towel in half to produce a new towel 15 in wide by 12.5 in in length. Measure your yarn eight times the width of the towel.
The red and yarn needle and tie and not the two ends together to double the yarn for sewing.
Using the blanket stitch, you will want to make 31 vertical stitches about a half inch apart across the top of the center fold. Sometimes you will find that your towel is not exactly that size so then adjust so that you have half inch vertical stitches.
You are a third of the way there to finishing your crochet hanging kitchen towel pattern. Great job.
Towel Stitches

Please note, the pattern will be worked with two strands of yarn held together throughout.
Row 1: place a slip knot on your hook. Slip stitch between first two vertical bars underneath the top loops (counts as CH 1), CH 2. RPT (between the next 2 bars, DC) across, CH3 and then turn your towel.
Take note that throughout the pattern, Ch-3s count as 1 DC in the next rounds.
Row 2: 1 DC in next ST, DC2TOG in next ST. RPT (in next ST, 1 DC . In next ST, 1 DC. In next ST, DC2TOG across. CH3, and then turn.
Take Note: Throughout this pattern, the (1 DC, 1DC, , DC2TOG) might not complete fully as your crochet. Ending on 1DC will not adversely affect the pattern. If you have 3 ST left on a row simply end with a (1DC, 1DC, 1DC)
Rows 3-6 1 DC in next ST, DC2TOG in next ST. RPT. (in next ST, 1 DC. In next ST, 1 DC. In the next ST, DC2TOG) across. CH3 and then turn.
If you started with 31 vertical stitches, you will end up having 9 stitches at this point. This will be the thickness of the loop section. However, if you made more stitches, you may need another row or two of decreased to get it to nine stitches. It’s best to have either Seven, eight, or preferably nine stitches for the loop section.
How to Make your Loops
Row 1 through 4 one DC in each ST. CH3 and then turn.
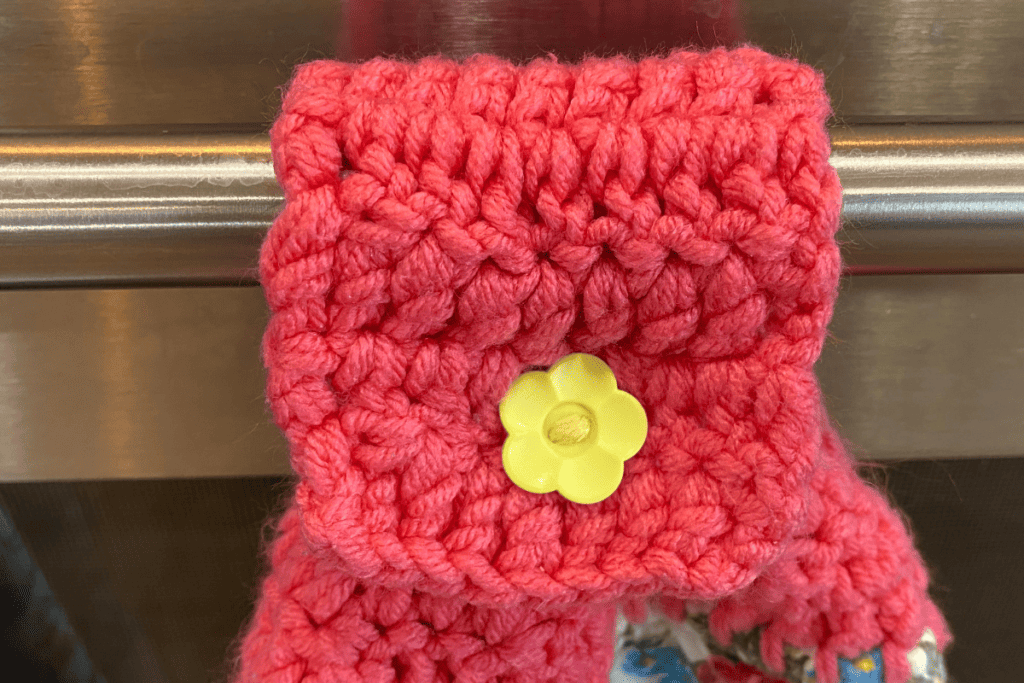
Row 5: 1 DC in first four STs. Make buttonhole as follows (CH1. SK1 ST.) 1DC in last 4 STs . Don’t forget to test button through buttonhole. CH3 and then turn.
If you weren’t able to get 9 STs, make sure and adjust the buttonhole if needed. It may need to be centered differently.
Row 6: 1 DC in each ST. Fasten off.
Now it’s time to sew your button in the middle of your towel near Row 4


How do you get the holes in the towel?
You can use a needle to put the holes