Magic Ring Crochet Stitch Video and Written Tutorial
When you start a crochet project, creating a tight, secure center can make all the difference. That’s where the magic ring crochet stitch, also known as the magic circle or adjustable loop, comes in handy.
It’s a technique that allows you to pull the center of your work closed, leaving no hole—an ideal starting point for projects like hats, amigurumi, and granny squares.
The magic ring can be a bit tricky to master at first, but once you get the hang of it, you’ll see how it creates a neat, professional finish from the very beginning.
It’s a game-changer for projects that need a snug start, so don’t be discouraged if it takes a few tries to perfect.
Before you know it, you’ll be opening up a world of crocheting possibilities with this versatile method. Remember, practice makes perfect, and happy crocheting as you create this crochet magic circle.
Magic Ring Crochet
Video Tutorial: Magic Ring Crochet
Magic ring, or adjustable loop, is a fundamental technique in crochet for creating a tight center—ideal for amigurumi and other circular projects. You’ll nail this skill with the right materials and a clear understanding of the basics.
Understanding the Basics
Before you dive into crocheting a magic ring, it’s good to know what you’re aiming for: a neat, adjustable starting point for your crochet projects that requires no sewing up of holes later.
You’ll make an adjustable loop with your yarn, then stitch your first round of crochet into that loop. The beauty of the magic loop lies in its versatility—it can be easily tightened or loosened by pulling on the yarn tail.
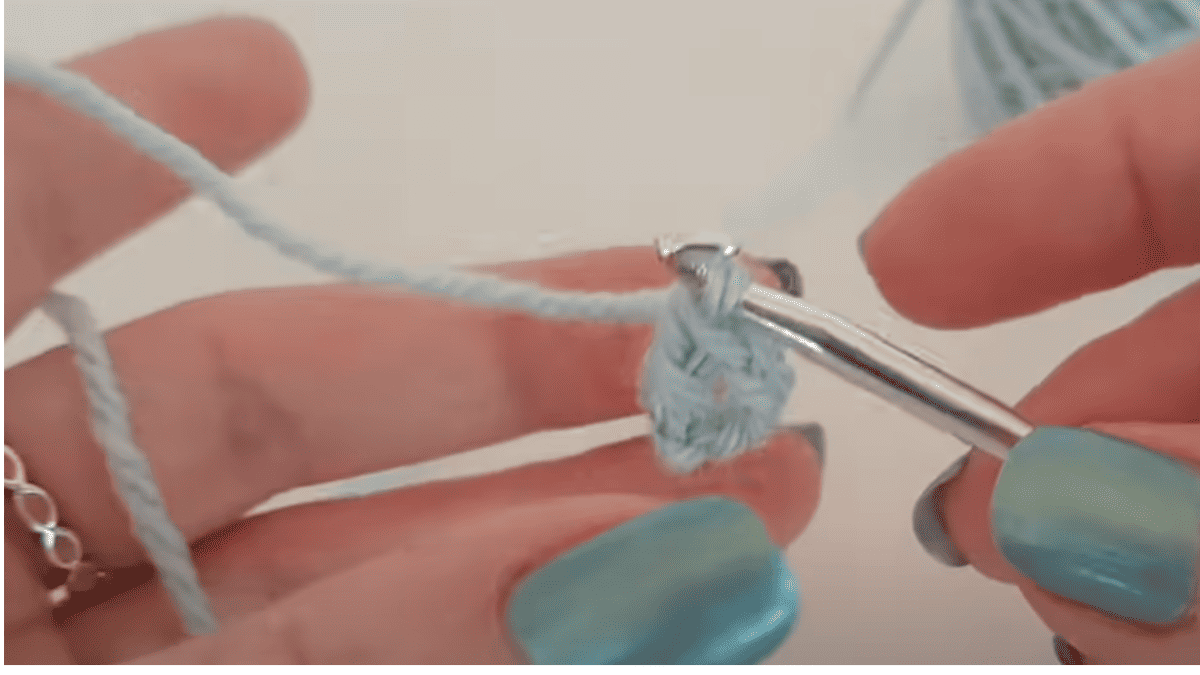
To start, make a loop with your yarn, ensuring the yarn tail is under the working yarn. Insert your crochet hook into the loop, yarn over (this is where you’ll catch the working yarn) and pull up a loop—this makes your initial slip knot.
Now, you’ll crochet the required number of stitches into the ring. After that, just pull the yarn tail to tighten the loop, creating a secure center.
Choosing the Right Materials
Selecting the appropriate crochet hook and yarn is key for a successful magic ring. The size of the hook should match the weight of your yarn to ensure your stitches are neat and consistent. Here’s a quick guide:
- Lightweight Yarn: Use smaller hooks (2.25mm – 3.5mm).
- Medium Weight Yarn: Opt for medium hooks (3.5mm – 5mm).
- Bulky Yarn: Go for larger hooks (5.5mm and up).
Remember, the feel of the hook is also important—comfort matters! Whether you choose a hook made from aluminum, plastic, wood, or another material, pick one that feels good in your hand.
Yarn choice also influences the outcome. For practice, a smooth, light-colored worsted-weight yarn might make it easier to see your stitches.
As you get the hang of it, you can experiment with different textures and weights.
Getting started with Magic Ring crochet technique is a small yet significant step towards more intricate crochet projects.
With this skill up your sleeve, you’ll be creating virtually seamless beginnings in no time.
Creating Your Magic Ring
The magic ring, also known as a magic circle, is a foundational technique in crochet for starting projects that work in rounds.
This ring allows you to pull your stitches tight, eliminating any gap at the beginning of your work.
Step-by-Step Creation Process
- Make the Loop: Lay the yarn end over your palm, tail end facing you. Wrap the working yarn over your index and middle finger, crossing it over the yarn end to create a loop.
- Insert the Hook: Slide your hook under the first piece of yarn on your fingers and grab the second piece, pulling it through to create a loop on your hook.
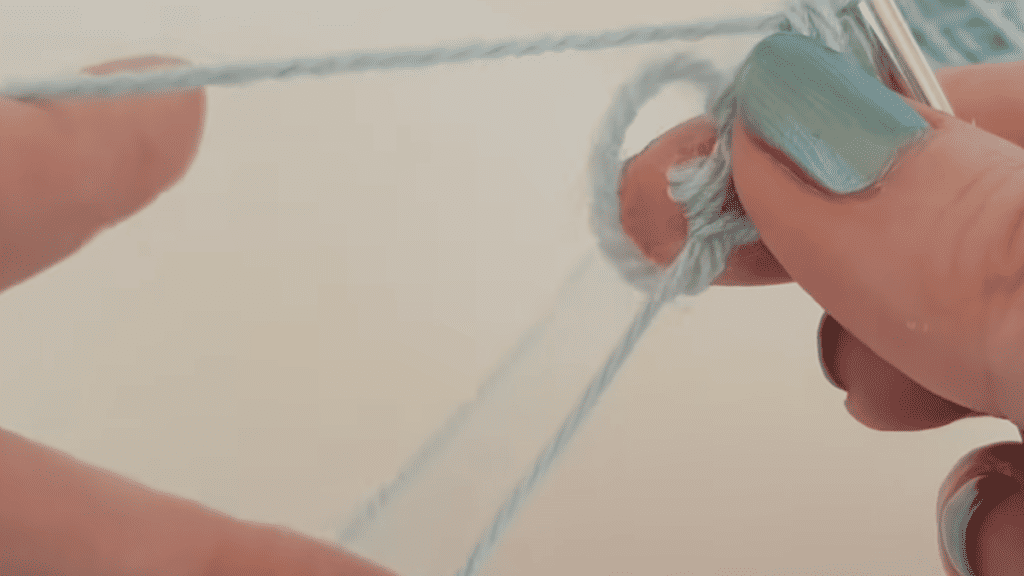
- Secure the Loop: Slide the loops off your fingers, holding the cross section between your thumb and middle finger, and pinch where the working yarn and tail cross.Yarn Over and Pull Through: Yarn over with your working yarn and pull through the loop on your hook. This serves as your first chain (not a single crochet stitch just yet).
- First Single Crochet: Insert the hook into the center of the loop, yarn over, pull through to have two loops on the hook, yarn over again, and pull through both loops on the hook, creating your first single crochet stitch.
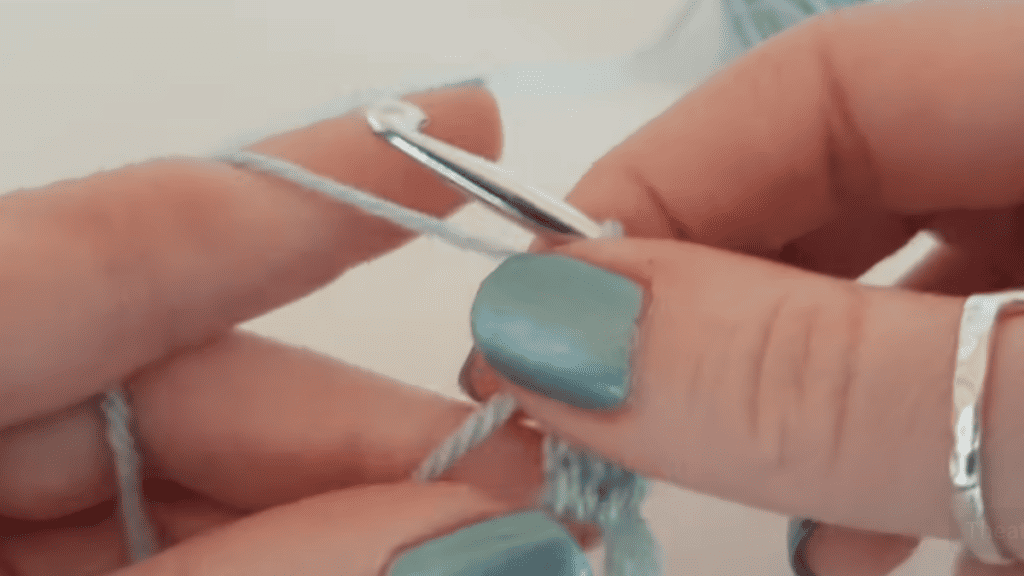
- Continue Single Crochet Stitches: Repeat the process of making single crochet stitches into the center of the ring until you have the required number of stitches for your project.
- Close the Ring: Grab the tail end of your yarn and pull it tight to cinch the ring closed.
Tips for Tightening the Ring
- Tug Gently: When pulling the yarn end to tighten the ring, do so gently to avoid deforming the stitches or breaking the yarn.
- Even Tension: Maintain even tension in your working yarn as you make your stitches to ensure that they are uniform in size.
- Count Your Stitches: As you work, count your single crochet stitches to make sure you have the exact number needed before tightening the ring.
- Secure the Ring: After tightening, you might want to secure the ring with a slip stitch or by weaving in the tail end through your stitches for added stability.
Techniques and Variations
In the world of crochet, mastering the magic ring technique provides a foundation for creating tight and secure beginnings for projects. Let’s explore the differences and benefits of various methods.
Traditional Vs. Alternative Methods
Traditional magic circle technique forms the base of projects like amigurumi and granny squares. You wrap yarn around your fingers including your index finger, creating a loop.
After inserting your hook, you make stitches like single crochets into the loop and then pull it tight.
Alternative method:
- Double magic ring – An adaptation which involves wrapping the yarn twice to create a more secure center ring.
- Continuous spiral – Used particularly in amigurumi, it allows you to crochet in a spiral without joining the rounds, giving a smoother finish.
By understanding both, you broaden your crochet capabilities.
Advanced Variations

Granny Squares:
- Basic: Start with a magic ring and follow up with chains and double crochet stitches to expand.
- Variation: Introduce color changes or different stitch patterns within the rounds for complexity.
Amigurumi Projects:
- Instead of joining rounds, you can use a continuous spiral technique. This way, you don’t create a seam, and your amigurumi looks evenly round.
Bold use of the magic ring gives your work a neat and refined start. As you venture into patterns demanding precision, these foundational techniques become your go-to skills.
Finishing and Troubleshooting
In the final phases of your magic ring crochet project, you’ll secure the ring and tackle any issues that arise. These steps ensure your project looks polished and durable.
Securing the Ring and Finishing Off
To finish your magic ring, it’s essential to secure it properly to prevent unraveling. After completing your last stitch, cut the yarn, leaving a tail of about six inches. Thread the tail end of the yarn through a yarn needle.
The next step is to weave the needle through the last few stitches, pulling gently to retain the shape of your work.
To close the small hole in the center of the ring, insert the needle back into the center and give a gentle pull.
Weave in the loose end several times in multiple directions, including the opposite direction to secure it and then trim any excess yarn.
Common Problems and Solutions
Problem: Unsightly Hole in Center
Solution: Gently tug on the tail end to tighten the magic ring, reducing the hole’s size.
| Trouble | Quick Fix |
|---|---|
| Too Loose Final Stitch | Insert the needle under both loops of the last stitch and tighten. |
| Visible Loose Ends | Weave the ends back into your work for a minimum of three inches. |
Remember, if the center of your ring looks larger than desired, use your yarn needle to weave around the initial stitches and pull tight to cinch it closed.
If your work has a too-tight ring that’s causing the project to buckle, you might want to carefully undo and redo the initial ring with a bit more slack.
Keep practicing, and soon securing and troubleshooting your magic ring will feel like second nature.
Crochet Stitches
See all of the crochet stitches and learn new stitches for your next crochet pattern.


One Comment