4 Easy Steps On How to Make a Slip Knot Crochet Stitch
Crocheting is a great hobby, and every crochet project begins with a foundational skill: learning how to make a slip knot crochet stitch.
It’s the first step to getting your yarn on the hook, the slip knot method is a simple loop that starts it all. Unlike some complicated knots, mastering the slip knot is quick and starts off your crocheting adventure.
There are a few different ways to create a slip knot, but they all lead to the same result—a secure, adjustable loop.
You might find as a beginner crocheter you have an easy way with one method than the others, but they are all worth trying out as you might prefer one method depending on the yarn or the project at hand.
Whether you’re a seasoned crocheter or picking up the hook for the first time, knowing how to tie a reliable slip knot is essential and, thankfully, straightforward no matter the different methods
Crochet Basics
Before you dive into crocheting, understanding how to select the right yarn and hook is crucial, just as learning to create a slip knot is an essential first step.
Understanding Yarn and Hook Selections
When you’re picking out your yarn, you’ll notice there’s quite a variety. Yarn weight refers to the thickness of the yarn, and it’s important because it affects the look and size of your stitches. For beginners, a medium-weight yarn (like worsted) is a great choice because it’s easy to handle.
| Yarn Weight | Suggested Hook Size |
|---|---|
| Fine | 3.5mm – 4.5mm |
| Medium | 4.5mm – 5.5mm |
| Bulky | 5.5mm – 8mm |
Choose a hook that matches your yarn strand to make sure your stitches are even, and your hands remain comfortable. Your hook package should have a recommended yarn weight listed.
How to Make a Slip Knot Crochet
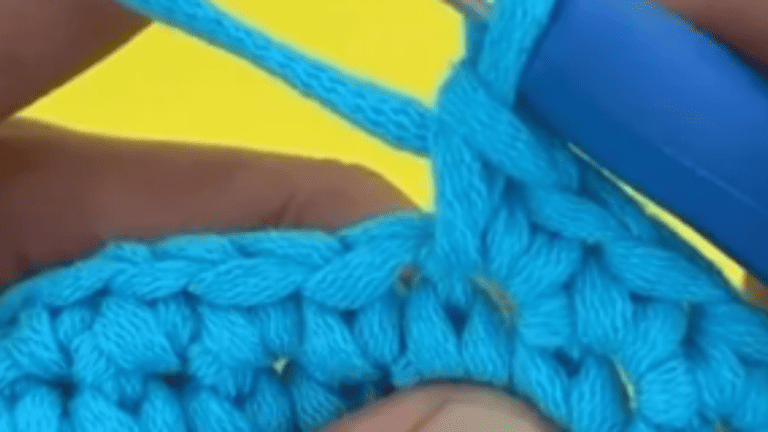
See Video tutorial of Crochet Slip Knot
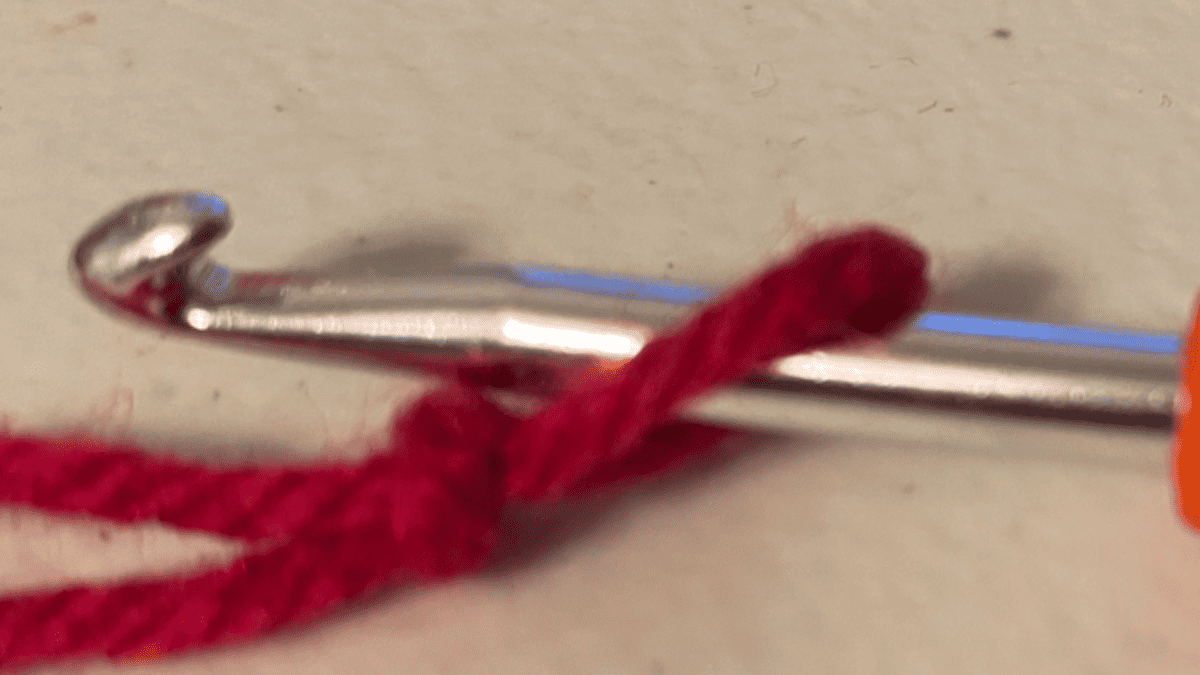
The slip knot is your very first step in crochet—this is how you’ll secure the yarn to begin stitching. Hold the tail end of the yarn in your left hand and loop the yarn around your right hand to create a circle.
- Pinch the tail between your thumb and forefinger.
- With your other hand, pull a loop of yarn through the circle—don’t tighten it yet!
- Insert your hook into the loop and then tighten by pulling on the tail of yarn.
You’ve just created a slip knot! It should slide easily up and down your hook, giving you the flexibility to adjust tension as you start crocheting.
Step-by-Step Guide to Making a Slip Knot

Before you begin, remember that making a slip knot is the foundational step in crochet. You’ll want to handle your yarn and hook comfortably and ensure your knot has the right level of tension for easy crocheting.
How To Hold Crochet Yarn
To start off, take the crochet hook in your dominant hand—this will usually be your right hand if you’re right-handed, or the left if you’re left-handed.
Hold it similarly to how you would grip a pencil. With your other hand, you’re going to control the yarn. The yarn tail is the short end, and the working end is the longer, attached part that comes from your yarn ball.
Crochet Slip Knot
See Video tutorial of Crochet Slip Knot
Now, let’s make the loop:
- Lay the yarn flat over your left hand—palm up—with the free end hanging down and extending past your wrist, around 4 to 6 inches.
- With your right hand, pick up the working end and wrap it around your left index finger and middle finger once, crossing it over the yarn tail to make an “X”.
- Gently slide this loop off your fingers, taking care not to let it unwind.
- Insert your hook into the loop from front to back, catching the working end of yarn.
- Pull this working end through the loop, creating a new loop on your hook.
Adjusting the Knot Tension
Finally:
- Hold the tail of the yarn with your left hand and the hook with your slip knot in your right hand.
- Gently tug the tail while sliding the knot up to your crochet hook.
- Adjust the loop to fit snugly—not too tight or too loose—around the hook shaft. The knot should move freely up and down the hook when you pull on the working yarn.
Following this method ensures that you have a reliable starting point for your crochet project.
First Stitch and Foundation Chain
To begin your crochet journey, start with the first chain stitch. Here’s how you do it:
- Insert your hook into the slip knot.
- Loop the yarn over the hook (this is called a yarn over).
- Pull this loop through the slip knot to create the first chain stitch.
Repeat the process to create a foundation chain. This sequence of chain stitches acts as the backbone for your crochet piece. If you’re aiming to create a “magic ring or magic circle,” you’ll use a variation of these steps to form a loop which will be closed to secure the stitches.
Tips for Beginner Crocheters
As a beginner, you might encounter a few common challenges. Here are some tips to keep you on track:
- Keep tension even: Hold the yarn at a consistent tension to ensure your stitches are uniform.
- Try not to make your chain stitches too tight; it can make working into them more difficult later on.
- Count your stitches: It’s crucial to keep an accurate count to prevent your work from increasing or decreasing unexpectedly.
- Practice makes perfect: Don’t expect perfection right away. Crochet is a skill that improves with practice.
Remember that every crochet pattern builds upon the foundation chain, so take your time perfecting these basics before moving forward. Happy crocheting!
Crochet Patterns
Know that you know how to do a basic slip knot, it’s time to find a project to work on. We have thousands of crochet patterns you can choose from. How about finding you a crochet tutorial to start crocheting with.
If you are new to crochet, there are easy methods and each one will use a different type of yarn. Make sure the first things you do is find the correct ball of yarn to use. Other crochet tools you will want include Stitch markers and crochet hooks.
Worry Worm Crochet Pattern
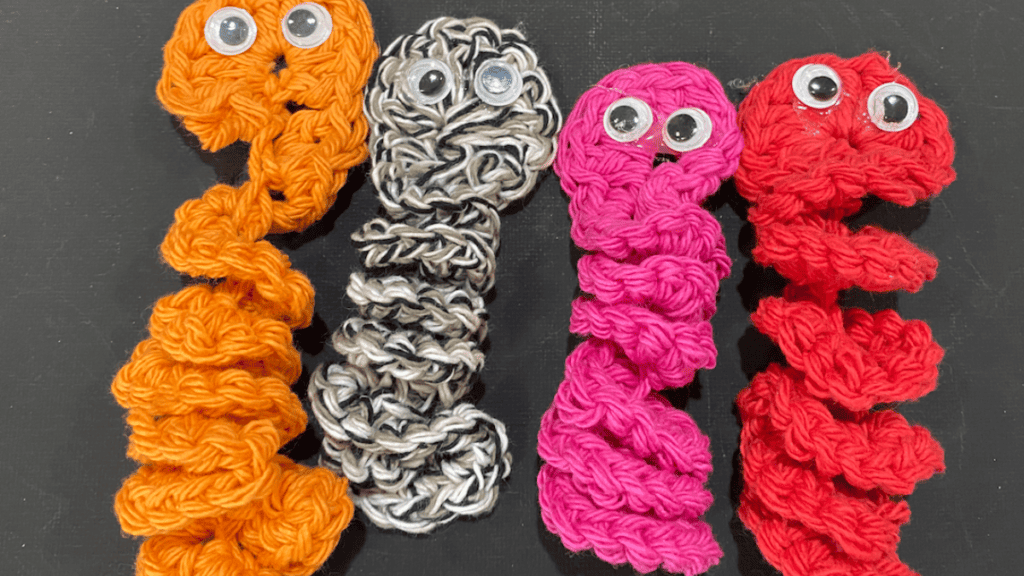
Download Worry Worm Pattern
this was the first skill I learned when I picked up crocheting. It uses a slip knot loop, chain stitch and single crochet stitches. This series of chain stitches will create a super cute worry worm. You can do a bright color worm or use a multicolored yarn.
All of them turn out super cute. All you need is worsted weight yarn, a 5 mm crochet hook and basic steps.
Crochet Granny Square Patterns

Download Granny square patterns
This is another easy step-by-step tutorial that helps you learn basic crochet stitches. These patterns use a pattern you will use again and again and once you learn it, you can easily create blankets, purses and more.