
Tunisian Full Stitch Guide: Master This Easy Crochet Technique
Tunisian crochet presents an intriguing blend of knitting and crocheting, drawing crafters in with the potential for creating intricate, woven-like fabric. The Tunisian Full Stitch, in particular, stands out for its simple execution and richly textured results.
If you’re venturing into Tunisian crochet, understanding this stitch is a solid step towards expanding your crafting repertoire. It involves just one hook and offers a satisfying rhythmic practice once you get the hang of it.
Starting with the basics, Tunisian crochet differs from traditional crochet in that it works stitches in a forward and return pass, keeping multiple loops on the hook, much like knitting.
This technique leads to a denser fabric perfect for warm garments and blankets. It’s one of my favorite types of crochet and I love using it to make blankets and potholders.
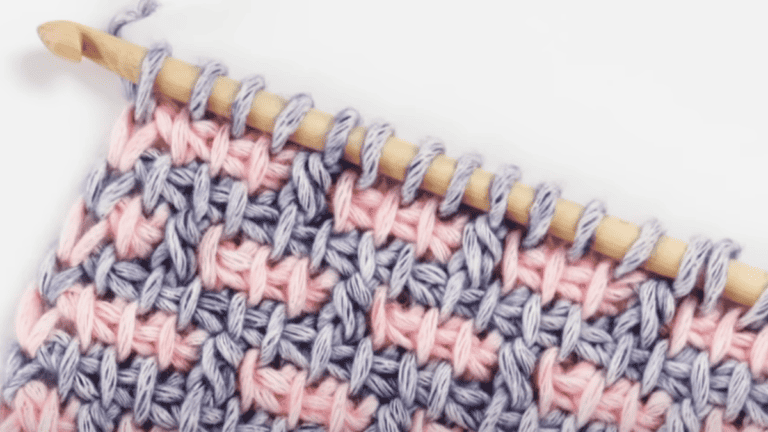
Tunisian Full Stitch
Video Tutorial: Tunisian Full Stitch
The video is how I learned Tunisian full stitch.
1. chain any number of stitches you need for your project
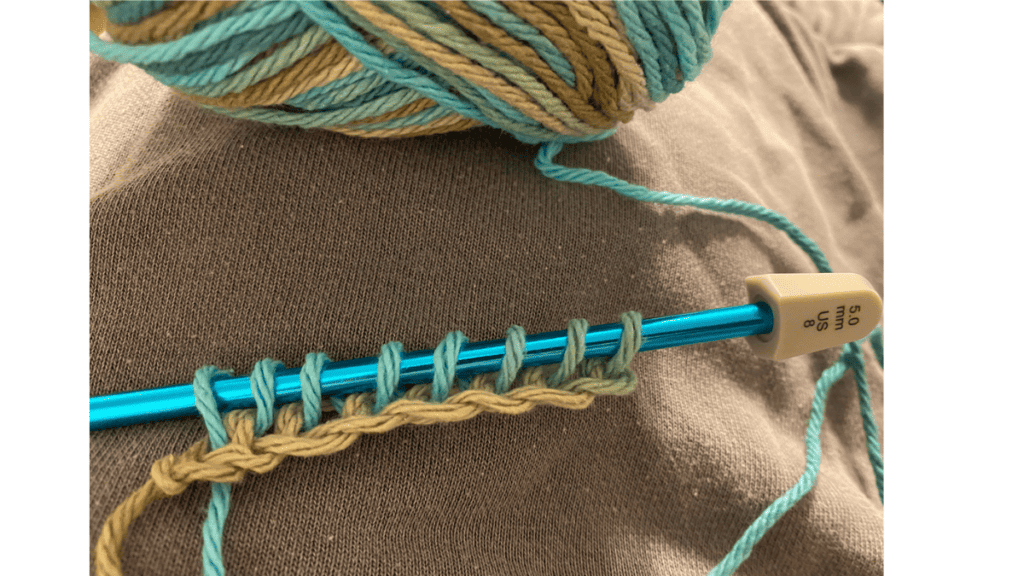
2. Grab that yarn and pull up a loop in the second chain from your hook. Then, keep on going, pulling up a loop in each chain all the way to the end
3. Alrighty, let’s talk about the backward pass. First off, chain one to make that edge stitch, just like you’d do in any other Tunisian stitch. Then, yarn over and pull through two loops, yarn over again, and pull through two loops. Keep doing that repeat dance until you reach the beginning of the row
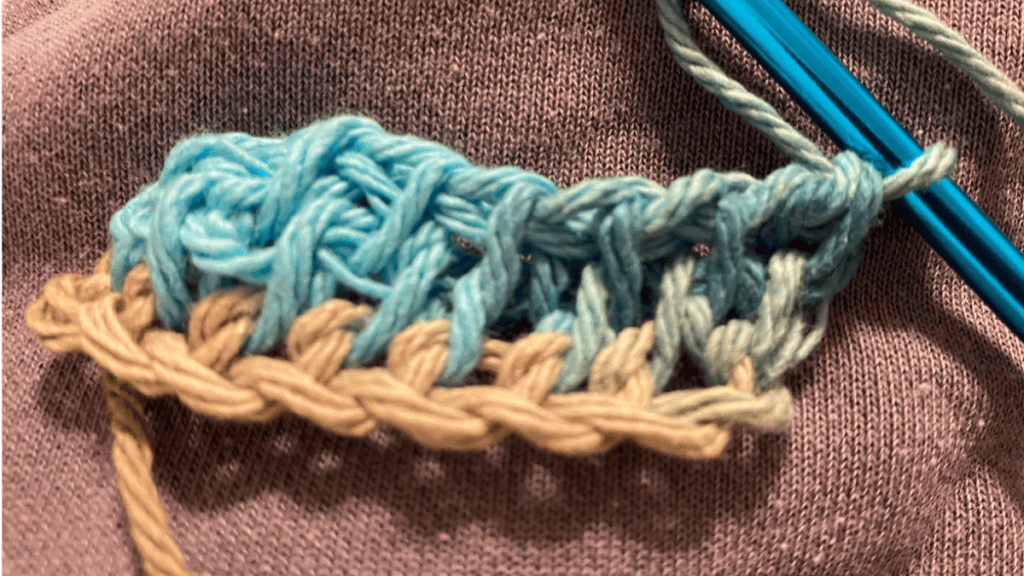
4. Insert your hook in the first space and then pull up a loop in each next space between your vertical bars. You will skip the last and instead do it in the last 2 stitches.
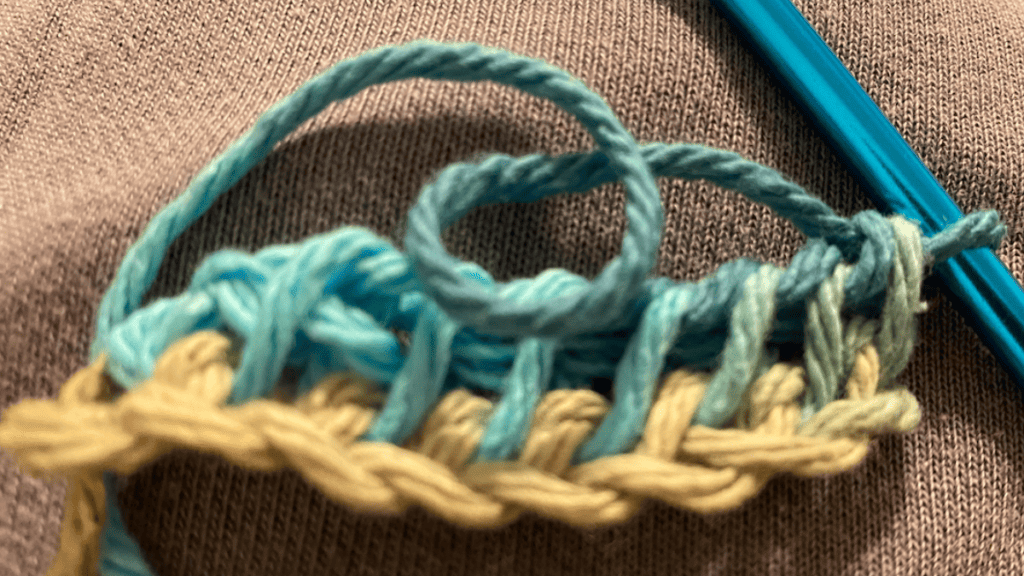
5. Alright, let’s tackle the backward pass. Start off by chaining one like you usually do. After that, yarn over and pull through two loops, then yarn over again and pull through two more loops. Keep at it like that until you’ve reached the beginning of the row
6. Skip that first space. Then, slide your hook into the next one, the second space, and create a loop. Keep on going, pulling up a loop in each space between those vertical bars until you reach the end. This time you will do a loop in your last vertical bar
7. Alright, let’s handle that backward pass. First up, chain one as usual. After that, yarn over and pull through two loops, then yarn over again and pull through two more loops. Keep on with that rhythm until you’ve reached the beginning of the row.
8. Keep alternating your two rows until you get your pattern the size you want.
Understanding Tunisian Hooks
Tunisian crochet hooks are distinct from regular crochet hooks. They are longer and can hold a larger number of stitches.
You can find a bunch of different Tunisian crochet hooks, but the recommended hook for beginners is an interchangeable Tunisian hook, which allows you to change the length of the cable as needed. For thicker yarns, a larger hook, typically 6 mm or more, is ideal.
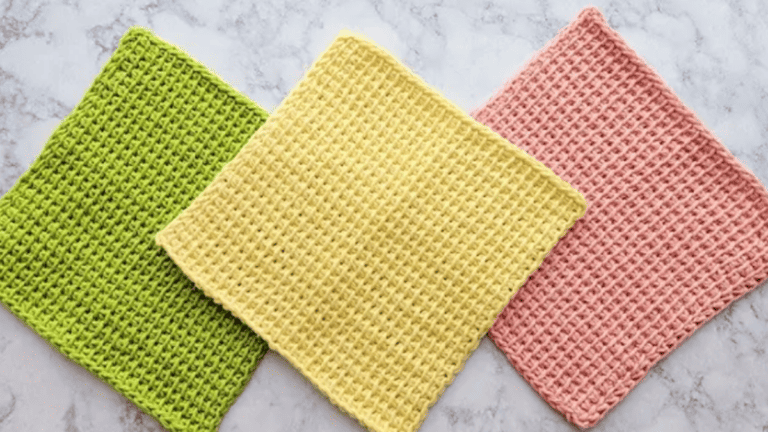
Basic Tunisian Stitches
To begin Tunisian crochet, it’s essential to master a few basic tunisian crochet stitches. These include the Tunisian simple stitch, knit stitch, and slip stitch. Each stitch provides a unique texture and appearance to the fabric.
Beginning the Stitch
When starting your work, create a slip knot and chain the required number of stitches for the foundation row.
This chain is the beginning of your row, and each chain represents a future Tunisian stitch.
Working the Forward Pass
The forward pass of Tunisian crochet involves picking up stitches. Insert your hook into the very first space (not the first stitch), yarn over, and pull up a loop.
Continue this process along the row, inserting the hook into the second space, and collect loops until you reach the end of the row.
Your loops need to be looser than you would anticipate because if not the return pass is difficult to complete.
Executing the Return Pass
After completing the forward pass, work the reverse pass, also known as the standard return pass, to complete the row.
Yarn over and pull through one loop to begin, then yarn over and pull through two loops repeatedly until one loop remains on the hook. This creates the characteristic horizontal bars of the fabric.
Finishing and Edges
To finish off your Tunisian crochet piece, bind off on the final row to create a neat edge.
This involves working each stitch as usual but then immediately performing a slip stitch. In the very last space of the row, execute the final edge stitch neatly to prevent your work from unraveling.
Starting a Tunisian Crochet Project
When starting a Tunisian crochet project, it’s essential to select the right materials and understand the basics of creating a foundation row.
You’ll also want to know how to manage stitch counts, select the perfect color and texture, and determine the size and shape of your project.
Selecting the Right Materials
To kick off your Tunisian crochet project, you’ll need a bunch of different Tunisian crochet hooks to accommodate various yarn weights and project sizes.
Tunisian hooks are typically longer than regular crochet hooks and may have a stopper at the end.
Choosing the right yarn is crucial, too. Caron Jumbo and Caron One Pound are some favorite yarns that work well for creating thick fabric with less stretch, commonly found in Tunisian crochet.
Creating a Foundation Row
Your project begins with a normal foundation row. Start by creating a slip knot and chain the desired number of stitches for your project’s width.
Instead of working into the chain directly, insert the hook into the back bump of the 2nd ch from the hook. This method gives a neater edge. Pull up a loop and keep it on the hook, continuing in each chain across.
Increasing Stitch Count
If your project requires a wider piece or you’re creating vertical stripes, you might need to increase the stitch count.
To do this, simply make extra stitches at the beginning or end of a row. Keep a consistent method throughout your project to maintain an even look.
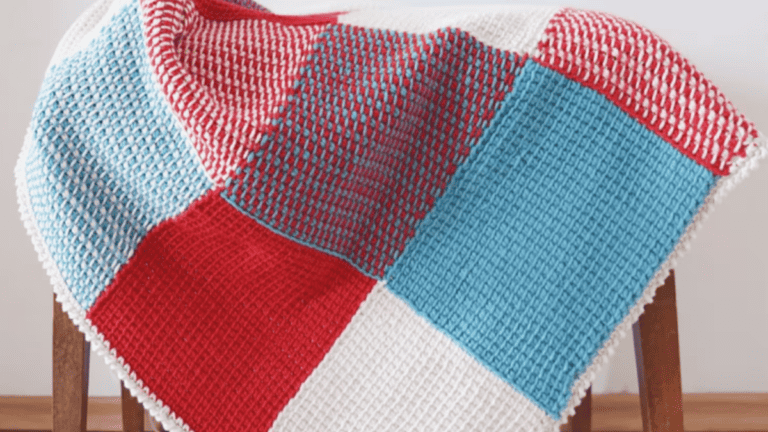
Choosing Color and Texture
The choice of yarn dramatically influences the texture and appearance of your work.
For example, using a contrast color (color B) or creating a color repeat pattern can add visual interest.
Feel free to experiment with different colors of yarn to achieve the design you’re after, especially if you’re working on a small project or a colorful crochet blanket.
Determining Size and Shape
Decide whether you’re making something compact like a baby blanket or a large throw.
Your stitch count from the foundation row sets the size framework. As you work, you’ll need to keep track of your rows to achieve the desired dimensions.
Tunisian crochet creates a denser fabric, so your final size and shape may differ slightly from what you might expect with traditional crochet.
Following and Understanding Patterns
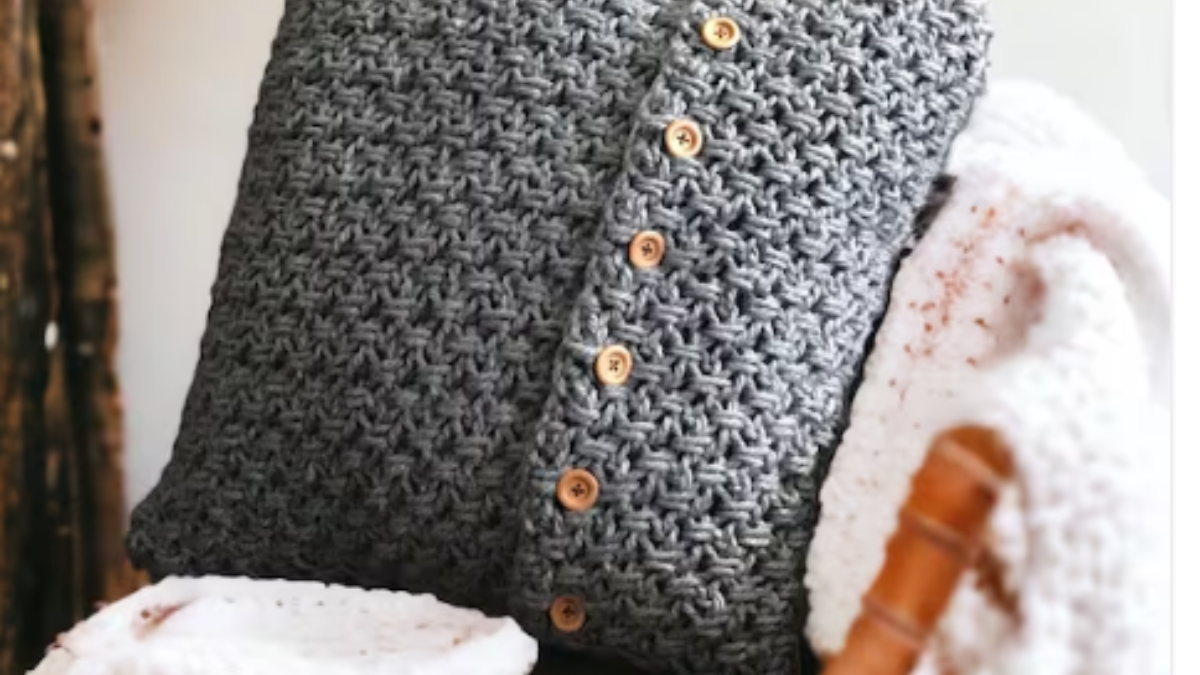
Patterns in Tunisian crochet can seem daunting, but once you get the hang of the symbols and repeats, you’ll be on your way to crafting exquisite pieces, such as the exotic-looking bryn blanket.
Reading Tunisian Crochet Patterns
When you pick up a pattern, especially for a pretty pattern like the bryn blanket, start by looking at the key. It’ll tell you what each symbol means.
A Tunisian full stitch row will be shown with its specific icon, which is crucial to follow for maintaining the correct tension throughout your project.
Additionally, keep an eye out for terms like “last loop” or “side loops,” as these will affect how your project edges look.
Pattern Repeats and Sequences
Each free pattern often includes sequence repeats, indicating a set of stitches that you’ll need to follow multiple times across a row.
For example, if your Tunisian full stitch row says to “repeat row” until you reach a certain length, you’ll need to follow the exact set of instructions from the first “last loop” of the previous row to the last “last loop” before the side loops. This is typically presented in a pattern with an asterisk (*) or other markers.
Troubleshooting Common Issues
You’ve likely encountered a situation where the pattern isn’t adding up.
If the number of loops on your hook doesn’t match the pattern by the time you reach the last loop of the previous row, it’s time to count your stitches.
Check from the start of the repeat sequence and ensure you haven’t missed or added any extra stitches.
Remember that the bryn blanket or any Tunisian crochet project is often a great choice for practice because any mistakes are generally easier to identify and fix due to the dense nature of the stitches.
Finishing Techniques and Tips
Once you’ve completed the main body of your Tunisian Full Stitch project, the next steps are crucial for giving your work a professional and polished look.
Binding Off Your Work
To neatly finish your Tunisian crochet, you’ll need to bind off. Here’s how:
- Insert your hook into the next stitch.
- Yarn over and pull through both the stitch and the loop on your hook.
Repeat this step for each stitch across. Ensure each stitch is neither too tight nor too loose for a smooth edge.
Adding Borders and Embellishments
Borders can transform your project with a touch of elegance or a dash of fun.
For a simple border:
- Start with a slip stitch on any corner.
- Use single crochet for a subtle border or try a scalloped edge for a more decorative flair.
Embellishments like appliques or surface crochet can be added with a blue pin to mark your starting point and a pink pin to indicate where your design finishes.
Weaving in Ends for a Clean Look
A few steps to maintain that tidy finish:
- Thread the yarn tail through a yarn needle.
- Weave in and out of several stitches on the wrong side of your work.
Be sure to weave in multiple directions for added security. Remember, patience is key for a clean and invisible finish. Happy crocheting!
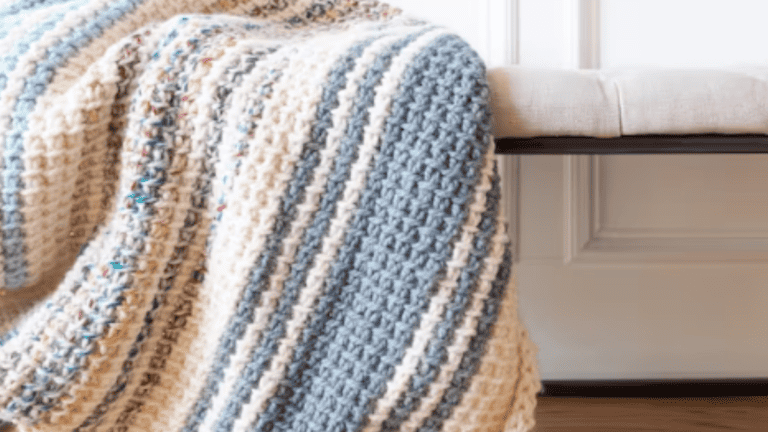
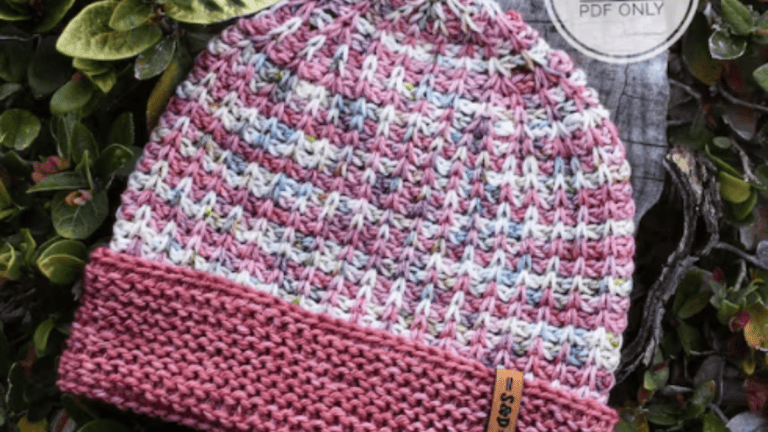
Tunisian Patterns
Tunisian crochet isn’t just for blankets; it’s suitable for a variety of projects.
Use Tunisian Full Stitch to craft everything from hats and scarves to sweaters and shawls.
Here are some of our favorite patterns using Tunisian stitches:
One Comment