Learn How To Read Crochet Patterns For Beginners
Reading crochet patterns is a lot like learning a new language. At first glance, all those abbreviations and symbols might seem like a secret code. But fear not! Once you learn how to read crochet patterns, you’ll see they provide a clear roadmap for your crochet projects.
With patterns, you can create everything from simple scarves to intricate doilies, and the guidelines are right there waiting for you. It’s all about understanding the basics, and then you’re on your way to crafting handmade treasures.
Crochet patterns can guide you through the most complex of designs, but they do require a bit of knowledge to interpret. They’re composed of standard abbreviations and chart symbols that represent different stitches and techniques.
Mastering the meaning behind these shorthand instructions is key. Think of it as the difference between following a trail of breadcrumbs and wandering aimlessly through the woods. Knowing how to read the pattern means you’ll always have a path to follow.
Getting familiar with crochet patterns also means diving into project schematics, gauge information, and finishing instructions. This might sound daunting, but it’s all part of the journey.
Schematics will give you a visual of the item’s dimensions, while understanding gauge ensures your creation is just the right size. Finishing instructions, on the other hand, add those final touches that make your project look polished and professional.
Once you get a grip on these elements, you’ll be all set to tackle any project you’ve set your heart on.
How To Read Crochet Patterns
Crochet patterns come with their own language made up of abbreviations and symbols. It’s like learning to read a new script written for crafters. Your command over this lingo is vital for bringing crochet projects to life.
Common Crochet Abbreviations and Terms
When you start reading crochet patterns, you’ll encounter a variety of shorthand terms. These US terms usually represent the basic crochet stitches and techniques that form the foundation of your project. Below is a table of the most common abbreviations alongside their UK term equivalents and what they signify:
| Crochet Abbreviations (US) | UK Equivalent | Description |
|---|---|---|
| ch | ch | Chain stitch |
| sc | dc | Single crochet (double crochet) |
| hdc | htr | Half-double crochet |
| dc | tr | Double crochet (treble crochet) |
| tr | dtr | Triple crochet (double treble) |
| sl st | ss | Slip stitch |
| [] | [] | Work instructions within brackets as a group |
Photo Credit:funcrochetpatterns.com
Keep in mind, this is just the tip of the iceberg. Each pattern might have special stitches and additional abbreviations specific to the design.
Interpreting Crochet Symbols and Diagrams
Besides the abbreviations, crochet patterns can be written using symbols and diagrams. Each crochet stitch has a corresponding symbol, and these are universally standardized so, unlike the abbreviations, you won’t have to deal with the confusion of US vs. UK terms here.
Here’s a list showing some basic crochet stitches and their symbols:
- Chain stitch (ch): O
- Single crochet (sc): +
- Double crochet (dc, known as treble crochet in UK terms): T
These symbols are arranged to form a stitch pattern in diagrams, enabling you to visualize the project’s appearance. Note how different symbols represent different stitches and are often connected by lines or dots indicating chains or slip stitches that help you navigate the pattern flow. When you’re reading a diagram, you’ll typically start from the bottom right (for right-handed crocheters) and move leftwards, progressing upwards row by row.
Getting Started with Crochet Patterns
Crochet patterns may seem like a foreign language at first, but with a little practice, you’ll decode them with ease and start creating your projects. Let’s dig into the basics of understanding crochet patterns and how to gather your materials and tools.
Decoding Pattern Instructions
Crochet patterns use abbreviations and symbols to represent different stitches and techniques. Here’s a quick guide to some common terms you’ll encounter:
- ch: Chain
- sc: Single crochet
- dc: Double crochet
- tr: Treble crochet
- sl st: Slip stitch
Always start by reading through the entire pattern to familiarize yourself with any specific terms it uses. Look out for a key or legend that defines the abbreviations and symbols—if the pattern has one, it’s your roadmap. As a beginner crocheter, knowing your first stitch and foundation chain is crucial, so focus on those terms at the start.
Identifying the Right Materials and Tools
To begin crocheting, you’ll need the right hook size and type of yarn. These are often specified in your crochet pattern. If not, a good idea is to choose a medium-weight yarn and a size G or H hook as they are beginner-friendly. Here’s a simple table to help you match hook sizes with yarn weights:
| Yarn Weight | Suggested Hook Size |
|---|---|
| Lightweight | E-4 to G-6 (3.5mm to 4mm) |
| Medium Weight | G-6 to I-9 (4mm to 5.5mm) |
| Heavy Weight | I-9 to K-10 1⁄2 (5.5mm to 6.5mm) |
Photo Credit:funcrochetpatterns.com
Before diving into your project, make a gauge swatch to ensure your stitches are the correct size. This is especially important for wearables where fit matters.
You will also want to have stitch markers to mark the beginning of rounds or special stitches. These tools and good practice will set you on the right path to successful crochet projects.
Mastering Basic Crochet Stitches
Before you start creating amazing crochet projects, getting a grip on basic techniques is crucial. This will set a strong foundation for your crafting journey.
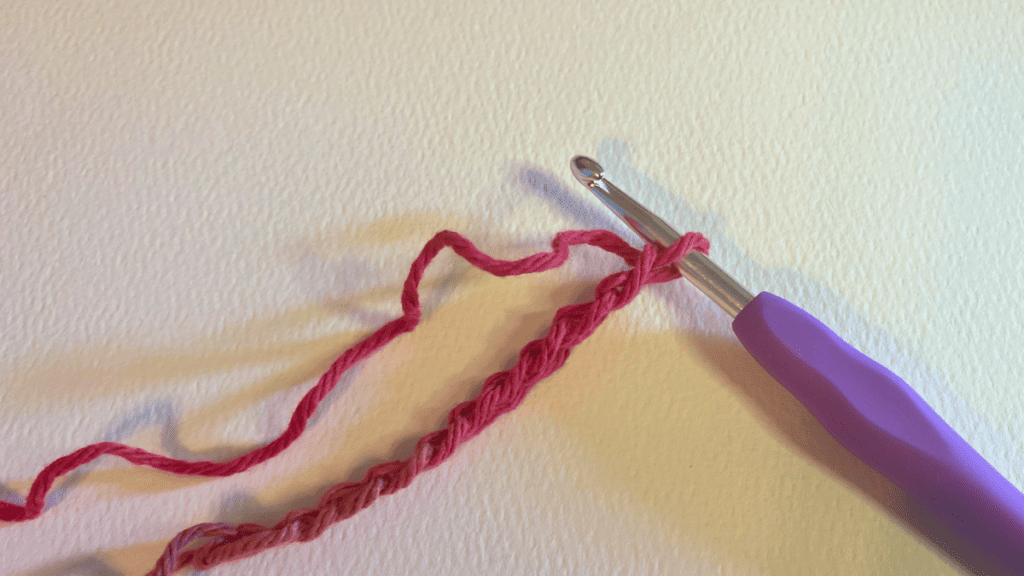
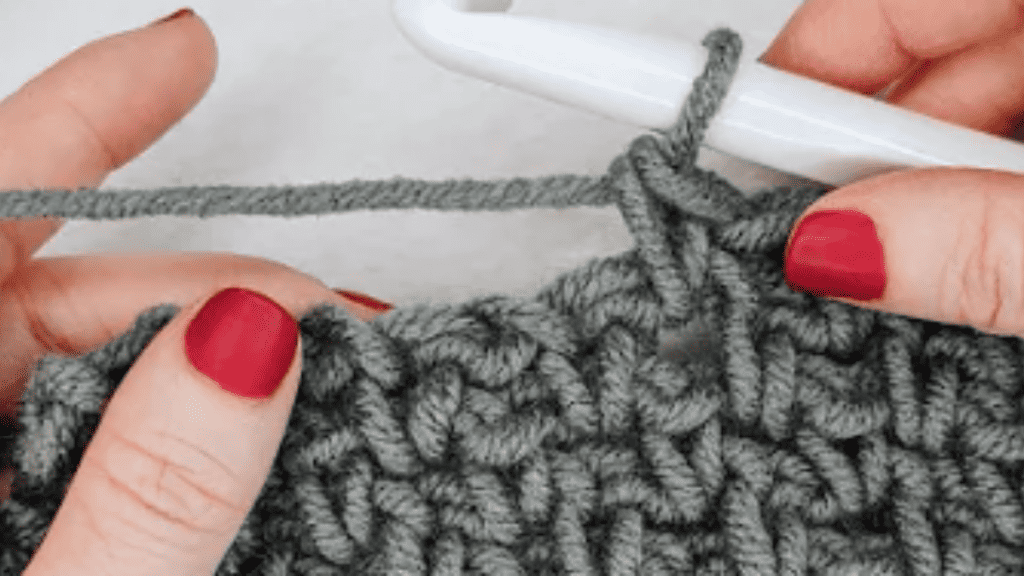
Creating the Foundation Chain and First Rows
To kick off any crochet project, you need to create a foundation chain. It’s a series of chain stitches (ch) that forms the base of your work. Here’s how to get started:
- Make a slip knot on your hook.
- Yarn over (yo) and pull through the loop on your hook. Congrats, that’s your first chain (ch)!
- Continue this process until you have the required stitch count for your pattern.
When you’ve got your foundation chain, you’ll start your first rows. Different patterns require different techniques, but typically, you’ll:
- Insert your hook into the second ch from the hook.
- Perform the stitch as instructed by your pattern, such as a single crochet (sc).
- At the end of the row, you may need a turning chain before you start the next one.
Remember, the first chain often doesn’t count as a stitch, so check your pattern to be sure. Keep an eye on your stitch count to avoid mistakes as you progress.
Understanding Different Stitch Types
Crochet patterns feature a variety of stitches, from simple to complex. Here are some of the most basic stitches:
- Slip stitch (sl st): Insert hook, yarn over, pull through both the chain space and the loop on your hook.
- Single crochet (sc): Insert hook, yarn over, pull up a loop, yarn over, pull through both loops on the hook.
- Double crochet (dc): Yarn over, insert hook, yarn over, pull up a loop, (yarn over, pull through 2 loops) twice.
You’ll often craft groups of stitches within a single chain space or into the next stitch to create textures and patterns. For instance:
- (sc, dc) in the next stitch means you’ll perform a single crochet and a double crochet into the same stitch.
Patterns also use terms like “magic ring” or “adjustable ring” for working in the round, where you make a loop of yarn and then crochet stitches into the loop. This technique is essential for amigurumi and similar projects.
Familiarize yourself with basic stitch abbreviations used in patterns to follow along more easily. Here’s a small table to get you started:
| Abbreviation | Stitch Name |
|---|---|
| ch | Chain |
| sc | Single Crochet |
| hdc | Half Double Crochet |
| dc | Double Crochet |
| tr | Treble Crochet |
As you practice these basic techniques, you’ll find that your speed and skill will naturally increase.
Reading and Following Complex Patterns
When you approach complex crochet patterns, it’s crucial to understand the intricacies of both the written and visual instructions. Your ability to read and execute these patterns with ease is about to increase.
Navigating Complex Stitch Sequences
Complex crochet patterns often include lengthy and intricate stitch sequences. To ensure you’re following them correctly:
- Read through the entire set of instructions before starting. This gives you a sense of what to expect and helps prevent surprises along the way.
- Look for special instructions at the beginning of the pattern. Designers may use non-standard abbreviations or techniques unique to their writing style.
- Use highlighters or sticky notes to mark repetitive sections or transitions between different stitch patterns for easier navigation.
- Take it one row or round at a time, and check off sections as you complete them to keep your place.
Utilizing Visual Aids for Crochet Patterns
Visual aids like crochet charts are incredibly helpful, especially for visual learners. Here’s how to make the best use of them:
- Crochet Chart:This visual representation of a crochet pattern displays stitches as symbols in a grid format, resembling the fabric’s appearance.
- Look at the chart’s legend to understand the symbols used.
- Practice “reading” the chart by following it row by row alongside the written instructions.
- Video Tutorial:If a picture is worth a thousand words, a video might be worth even more.
- Search for a video tutorial if the pattern instructions or a particular stitch is confusing.
- Pause and replay tricky parts as you work through the pattern.
With these strategies, tackling even the most complex of crochet patterns becomes manageable. Your toolkit is now equipped with clear-cut ways to interpret and follow intricate crochet instructions, whether you’re looking at a chart or written directions.
Tips for Successful Crochet Projects
Before jumping into your crochet project, it’s crucial to know that checking your work regularly and mastering finishing techniques are game-changers for the quality and appearance of your finished piece.
Checking Your Work and Troubleshooting
When you’re crocheting, especially as a beginner, it’s easy to lose track of stitches or mix up the right side (the side that will be facing outward on your finished item) and the wrong side (the side that will face inward). Here’s a quick checklist to keep you on track:
- Right Side vs. Wrong Side: Determine which is the right side after your first row. This will help maintain consistency in the look of your stitches.
- Pattern Sections: Review each section of the pattern before you start and after you complete it. Ensure you’re following the right steps for the right size.
- Rows and Stitches: Use a row counter or tally marks to keep track of your progress. At the end of a row, always count your stitches to ensure you haven’t missed any.
- Turning Chain: Practice makes perfect. Make sure your turning chain length is correct for the next row to avoid adding or dropping stitches inadvertently.
- Troubleshooting: If you notice a mistake in the previous row, it’s often easier to undo (or frog) your work back to the mistake rather than trying to fudge it. This will keep your pattern consistent and avoid any issues later on.
Finishing Techniques and Final Touches
Finishing your crochet project properly can transform it from an “easy pattern” piece to something that looks professionally made. Here are some specifics:
- Weaving in Ends: Always weave in your ends securely. This can prevent your work from unraveling and maintain the structure of your piece.
- Blocking: Once you’ve completed your project, consider blocking it. This involves wetting or steaming your finished project so it can be shaped to the correct size and helps the stitches to set and look more even.
- Consistent Edges: When you’re at the stage of adding a border or edging, make sure you’re evenly spacing your stitches around the edges for a neat finish.
As you become more adept at crochet, these practices will become second nature. Starting with beginner patterns that repeat the same stitch can help you build a strong foundation. With time, even the more intricate patterns will feel like a breeze to work through.
Advanced Crochet Skills
To really amp up your crochet game, you’ll want to get comfortable with more complex stitches and methods, and have fun putting your own twist on patterns.
Exploring Advanced Stitches and Techniques
As you look to tackle more intricate projects, mastering a variety of stitches and techniques is key. Get familiar with the special stitches such as the puff stitch, bobble stitch, or popcorn stitch to add texture to your work. Practice working in the front loop or back loop only to create ribbing or to influence the fabric’s drape.
- Front Loop Crochet (FLC): Insert hook into the front loop of the next sc and complete the stitch as usual.
- Back Loop Crochet (BLC): Insert hook into the back loop of the next dc for a ridge pattern.
Stitch Variations:
- Increase complexity by combining different stitches within the same previous round or next ch sp.
- Try beginning the first pattern repeat at a different part of the project, such as the right corner or next corner sp, to observe the changes in design.
Technique Drill-Down:
- First Round: Start with a smaller hook to maintain tight tension, then switch to a larger hook for subsequent rounds.
- Last Rep: On your final pattern repeat, adjust the tension or hook size to ensure consistency in sizes.
Experimenting with Variations and Customizations
Once comfortable with advanced techniques, customize patterns to reflect your personal style. Tweaking the original actual pattern can turn it into something uniquely yours.
- Customization Ideas:
- Changing colors at different stages of the actual pattern.
- Modifying an edge or border by adding a special stitch on the last rep or in each next corner sp.
Sample Adjustments:
- Hook Size: Use a smaller hook for denser fabric or a larger hook for a looser, drapier result.
- Stitch Position:
- Alter where you place your next sc or next dc for a different effect.
- Experiment with skipping spaces, like the next ch sp, to introduce lacier elements in your creation.
By integrating these advanced crochet strategies, your projects will evolve in complexity and style, showcasing your ever-growing skill set.
Crochet For Beginners
If you are like us, you have a ton of questions when it comes to crochet as a beginner. The next step is to learn more crochet things. We have a series we think you will enjoy.

One Comment